
Previous post on this build could be found here. I actually had some stuff done already prior to the weekend but begged off posting and just continued working on this kit till the end of the weekend. So far I have completed the chest and the arms.
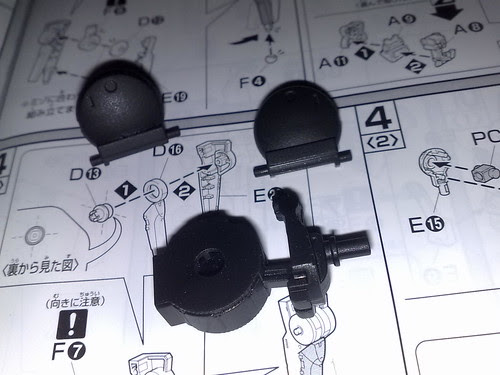
As usual practice of mine, I save the hands and the head assembly for last. So I skipped that part in the manual. The first photo on top is the swing mechanism for the neck. The photo below is that same mechanism right next to the drum like mechanism that will form part of the torso. Been snipping off some parts of the male pegs to make disassembly easy, incase a make a mistake during assembly and will need to take the part apart.

This was what I had prepped prior to the weekend. These chest pieces were sanded already and ready for painting.

Painting of the drumlike part of the torso had been finished by this shot. I used Pylox Flat black for this then once that had dried for about 30 minutes I finished it off with some RJ London Dull Lacquer. I noticed a "dandruff" problem with this painting session wherein white paint flakes had found its way onto the model. After some sleuthing I found out that the white flakes were left over paint residue from the Pylox Pure White Flat that had landed on my wooden painting base after they were kicked up from the spray of my painting activities. Having found that out, I really have to schedule a session to clean up that painting base. Probably sand it down then paint over it with some glossy paint. I'll probably paint it black so that I can easily see if there are paint residues left over.
More pictures in the following pages.
Here's the neck and drum like torso jointed together.

For the wing tips, I used the white sticker that came along with the kit. Somehow this didn't turn out to be a good idea because I did a lousy job of applying the stickers.

As you can see there are gaps left over where the black surface is showing. I'll use a white gundam marker to hide that.


The picture of the Box shot of the Over Flag is actually deceiving, I was led to believe that the entire model kit was colored black. Turns out there are some grey parts that are hard to discern in the completed shots of the model kit that you really have to take a closer look at in order to see. That part I'm coloring with some Pylox Misty Grey.

I was scared of running out of Pylox Flat Black so the day before I took a trip to my local hardware store and bought myself a can of Bonsy Flat Black. You can't really tell the difference between the two, but the arm parts were colored Bosny Flat Black while the chest part was colored with Pylox Flat Black.


Here's some shots of the torso with the arms attached.


And that all for this build update. Part III of this build post can be found here.


