
Its been a very busy weekend for me when it comes to building the 1/60 GN-001 Gundam Exia. Actually was able to finish a lot of stuff on the build. First shot was me assembling the legs. The inner mecha parts were colored using Pylox Metallic Graphite. The white parts were colored using Pylox Pure White flat, the red parts Pylox Fire Red, the yellow parts, Pylox Caterpillar Yellow then finished off with a coat of Bosny Dull Lacquer (clear coat). For primer I used Bosny Plastic Primer and TOA Plastic Primer.
For panel lining, I used a plain old 0.5 mm mechanical pencil. Except for the Pure White Flat, I first applied a coat of Dull Lacquer over the painted part before applying the panel lining. Afterwards I sealed the panel lines with a coat of Dull Lacquer.
There's actually a movable piston found in the back thigh. Didn't bother to color it anymore.

This ball part is what connects it to the waist.

This is the GN part for the knee. Again it shows my mistake of spraying a clear coat on a clear part. It actually made it foggy. I should have dipped this in a cup of Future Floor Wax for the glossy effect I wanted.


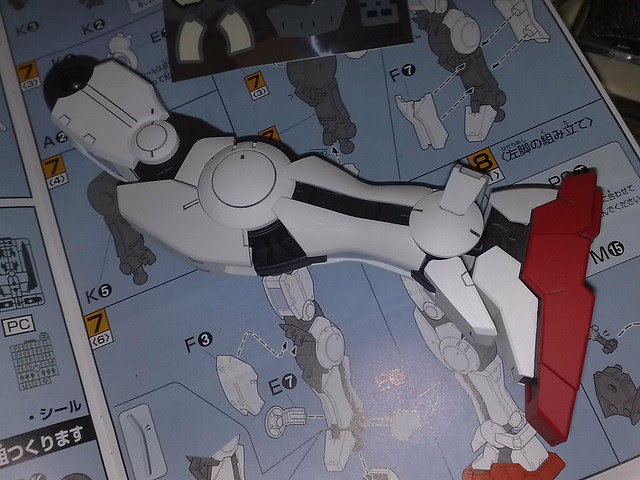
This is the main leg with a coat of Pylox Metallic Graphite and already given the dull lacquer coat.


You can see that the mechanical pencil line doesn't get into the recesses because of its size as evidenced by the two lines on the panels instead of a solid one. Usually I just apply a little pressure while lining, this in effect sharpens the tip of the pencil so that it can get to those recesses. But since I'm really not that much into perfection of the panel lines because I'm not joining any competition I just left it as it is.

Here's the last of the soft rubbers for the GN simulated conduits that supply power from the GN drive to the different mobile suit parts. This is unique from the other soft rubbers in manner of its installation. This on you have to fold in order to get into the recess. Which means that there is little rubber surface area holding it in place compared to the other soft rubber "thingys"

I used my file to tuck it in even more.

One of the completed legs.
Next to be worked on was the waist.


Here's both legs attached to the waist. I also selected the option of installing the "holsters" at the edge of the hips that is where the GN Long and Short blade are carried by the Exia.

I couldn't resist not mounting the torso to the lower body part yesterday so I ended up with this.

Today I worked on the hands. The 1/60 Exia hand assembly is quite different from the regular 1/100 Exia, this one is built like an MG where the fingers can flex. Well just the thumb, fore finger actually while the 3 remaining fingers are joined together. They can however bend to make a fist and carry weapons. The manual actually instructs you to not cut off the fingers from the runners. Instead you have to cut off the palm first then mount it on the the fingers that are still located at its runners. Quite nifty really.

After this, you still don't cut off the fingers from the runners as the back hand is mounted on to the hand.

Here's the hand cut off from the runners with the fingertips and thumb not yet installed.

After that was done, panel lining and all. I started to work on the head of the 1/60 Exia. Stickers were applied on the head for the eyes and forehead design.

Panel lining was also applied to the mask part before it was attached to the head.

Sides of the head.

Here's the head almost completed. Panel lining already done but not yet sealed with the Bosny Dull Lacquer.

Then finally mounted the completed and dull coated head part on to the torso.

Here's a somewhat more complete shot of the 1/60 GN-001 Gundam Exia

All that's left to work on now is the weapons and the shoulder antenna parts. After having fun with this build I'm actually contemplating on building a 1/100 GN-001 Gundam Exia. Just a non-grade because that's all that I can afford right now *snicker*
Part VIII of this build can be found here. Part X of this build can be found here.


